Planning an asphalt paving project? Understanding the process is crucial for a successful outcome. Here’s a detailed overview of the nine steps involved in asphalt pavement installation:
Step 1: Design the Surface
The process begins with designing the surface using GPS technology and AutoCAD software, ensuring precision with less than an inch of error. This step involves surveying and meticulously planning the project site.
Step 2: Demolition
Any existing materials, such as asphalt, concrete, or pavers, are removed to clear the area for new pavement. Recyclable materials, particularly old asphalt, are taken to asphalt plants for recycling, aligning with sustainable practices.
Step 3: Grading
Proper grading is critical for water drainage, which prevents premature pavement deterioration. The grade percentage varies based on the project’s location and landscape, ensuring effective water runoff and surface longevity.
Step 4: Preparing and Installing the Sub-Base
The sub-base is a crucial component that supports the asphalt pavement. It’s typically made from crushed rocks or recycled materials. A well-prepared sub-base protects against frost heave, provides stability, and supports the expected traffic load.
Step 5: Butt Joints, Transitions, and Curbing
Creating smooth transitions between new and existing pavement is essential. This involves ensuring that butt joints, where new pavement meets old, are seamless. Proper grading and curbing also contribute to effective water drainage and integration with surrounding surfaces.
Step 6: Installing the Base Course
The base course is a layer of aggregates and binder laid over the sub-base. This layer is spread and compacted to provide additional strength and stability for the final asphalt pavement.
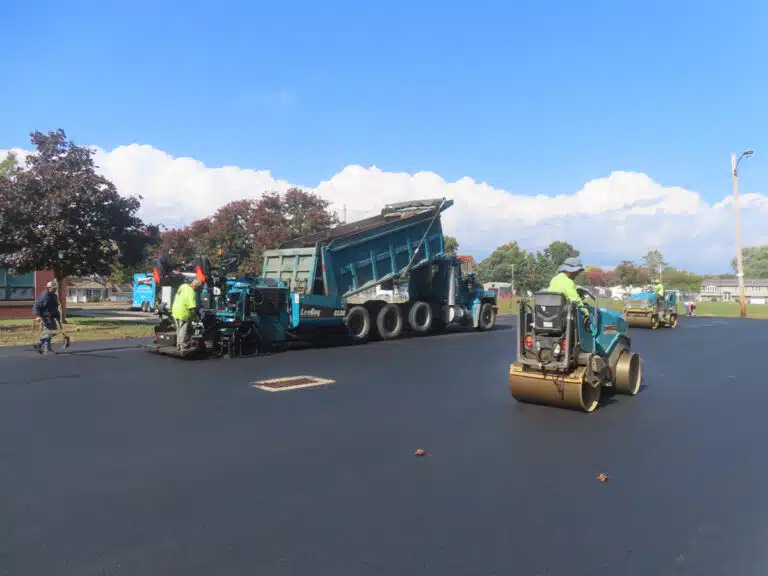
Step 7: Installing the Wear Course
The wear course, or surface course, is the top layer of asphalt. It’s designed to handle traffic loads and resist environmental wear and tear. This layer is composed of small aggregate, sand, and liquid asphalt, providing the smooth, durable surface seen on roads and parking lots.
Step 8: Compaction
Compacting the asphalt layers ensures that the aggregates are tightly bound, which adds stability and prevents deformation over time. Proper compaction also reduces permeability, helping to maintain the pavement’s integrity.
Step 9: Striping and ADA Compliance
The final step involves adding necessary road markings and ensuring compliance with the Americans with Disabilities Act (ADA). This includes parking stripes, accessibility markings, and any required road surface markings or rumble strips.
Conclusion
By following these nine steps, you can ensure a durable and efficient asphalt pavement installation. Proper planning, preparation, and execution are key to achieving a long-lasting, high-quality asphalt surface. Whether you’re paving a driveway, parking lot, or roadway, understanding each phase of the process will help you make informed decisions and ensure the success of your project. For more detailed information, consult with professional paving contractors who can tailor their approach to your specific needs and site conditions.